Sensational Craft: DIY Spin Art
A quick search on YouTube will turn up hundreds of oddly satisfying videos, many of which involve spinning objects. Spinning can be very calming for some people because spinning is a rhythmic movement. When it is slow and rhythmic, it can be relaxing to look at as a form of mindfulness meditation because it activates the parasympathetic nervous system. This is the part of the nervous system that helps us relax and quiet the areas of the brain that involve fear and anxiety (the sympathetic nervous system).
DISCLAIMER: This is not true for everyone. Spinning can be calming for one person while being very alerting and disorienting for another person, especially fast spinning.
This month’s sensational craft involves creating a spinning top that will splatter paint onto your paper in a very satisfying way.
Supplies Needed:
- A recycled CD
- Tape (clear tape or masking tape)
- Rubber bands
- Pencil or pen that will fit through the hole in the CD
- Four coins of the same size
- Liquid paint (preferably washable)
- Water (optional, if your paint is really thick)
- Spoon or eye dropper (optional, if you have to water down your paint)
- A large piece of thick paper (construction paper or card stock)
- An apron to cover your clothes
- Newspaper to cover your work area
- Box large enough to fit your paper (optional)
Directions:
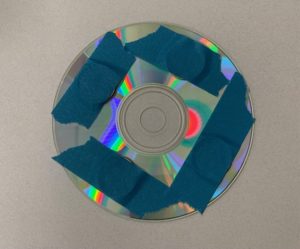
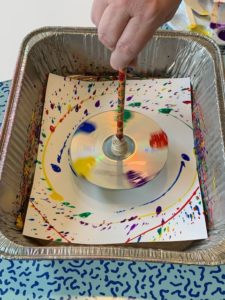
1. Tape coins to the bottom of the CD. This will help the CD balance so it spins better. Make sure they are spaced evenly.
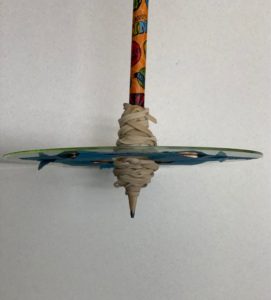
2. Put the pencil through the hole of the CD so only about an inch of the pencil is poking through. It needs to be very close to the tip of the pencil in order to get the best spin. Use rubber bands to secure the pencil. You will need quite a few of them to make sure the pencil doesn’t wiggle its way through the hole. I used very large rubber bands and found that I needed to place the rubber bands furthest from the pencil tip first, then put the CD on, then do the rubber bands nearest the tip. Make sure you put the rubber bands right up against the CD, and put the heavier rubber bands under the CD (by the tip) to make sure the pencil stays more balanced. If a rubber band breaks, don’t worry about it. You can still wrap it around and tuck the end under the other rubber bands.
3. Test the spinner to see how it spins. If it doesn’t spin well, there are a few things you can try:
Check the coins. Make sure they are fastened well with the tape. You can try moving them towards the center of the CD or towards the outside to see if one way works better. I used quarters first, but it didn’t seem to spin very well, so I switched to dimes. This will be something you will need to experiment with to see what works best for you.
Check the rubber bands. They should be tight up against the pencil and CD.
Make sure the CD is level.
4. Make sure your work surface is covered with newspapers, because this WILL get messy! If you have a box large enough to fit your paper, I would highly recommend you use that, as it will help contain the mess. Make sure the sides of the box are higher than the CD when you hold the pencil straight up. It’s probably a good idea to cover the table even if you do use a box.
5. Prepare your paint. If the paint is thick, you might want to add water to thin it out a little. The thickness of the paint will affect how the paint spins off the spinner. I’ll show you what I mean later.
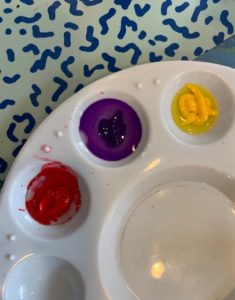
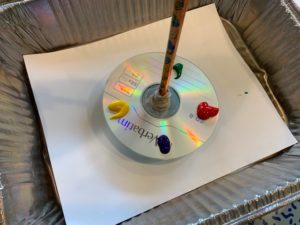
6. Add a few blobs of paint to the edges of the top of the spinner. You might want to have another person hold the spinner so the CD is level while you do this. This way, the paint won’t fall off before you even start. You can add one color at a time, or go crazy and try multiple colors.
7. Get spinning! Twist the spinner and watch it splatter! If your spinner doesn’t want to spin for a long time, you might want to keep your hands on the pencil to keep it going.
8. Once all the paint comes off, feel free to add more colors of paint to the CD and repeat until you are satisfied with your design.
A couple of notes:
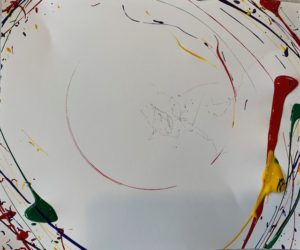
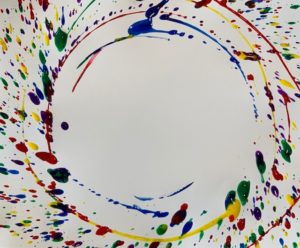
You’ll notice from the first picture above that there are pencil marks in the middle of the page. Obviously that is from the pencil as it was spinning. If you don’t like this look, you can always erase it once the paint is dry. I tried to dip the pencil tip in glue to create a barrier, but this didn’t seem to work well. It might not have dried fully as I was very impatient to get going with this craft. Another option is to take a small piece of paper (make sure it is smaller than the CD) and place it in the middle of the paper. Then the spinner will spin on that and you can remove it when you are done. This is what I did for the second picture.
The first picture shows regular tempera paint. I thought it was going to be thin enough, but it really just flew off the CD in big globs. I watered it down for the second one, and it was much more satisfying to watch and produced a more colorful picture.
What senses are active in this craft?
- Sight: The bright colors of the paint are very visually stimulating. It’s so fun to watch the paint fly off the CD and create new patterns on the paper. If you experimented with the consistency of the paint by adding water, how does that change the appearance of the paint? After the paint flies off, spin it again and watch the CD. What happens to the color left on the CD as it is spinning around?
- Sound: Can you hear the paint as it splatters on the paper and box? Does it make a different sound if you use thick paint instead of watered down paint?
- Smell: What does your paint smell like? Not all paints have a smell, but some are really strong.
- Touch: Did you get paint on your fingers? How does it feel? Is it sticky? Smooth? Slimy?
Reading Recommendations:
Our digital collection on hoopla has a nice selection of books where you can learn about the science of spinning as well as make crafts or do science experiments to learn more about spinning. Once you check out a book, you can view it on a computer or other device such as a tablet or phone. Here are a few:
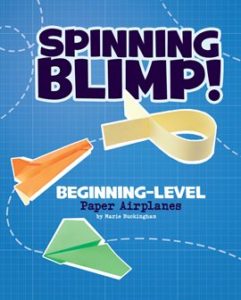
Spinning Blimp! Beginning-Level Paper Airplanes by Marie Buckingham
Send your readers flying down the runway with a simple fold, fold, fold and a side of science. Step-by-step instructions show budding flight-school students how to build the Spinning Blimp and other beginning-level paper airplanes, while hearty, fact-filled sidebars and an “inside the hangar” feature explain basic flight concepts. Engaging video tutorials and bonus content through the Capstone 4D augmented reality app really give this title wings!
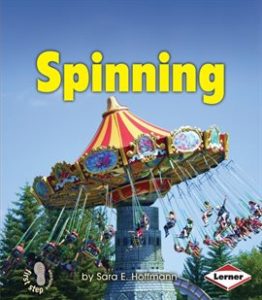
Spinning by Sarah E. Hoffman
Acquaint emergent readers with different objects that spin-think tops, fans and more!
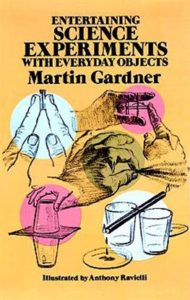
Entertaining Science Experiments With Everyday Objects by Martin Gardner
One of America’s most prominent popular science writers presents simple instructions for using common household items to illuminate scientific principles. Simple enough to be understood by an 11-year-old but informative enough for adults, 100 illustrated experiments cover subjects from astronomy, chemistry, physiology, psychology, mathematics, topology, probability, acoustics and other areas.
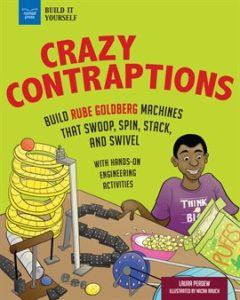
Crazy Contraptions: Build Rube Goldberg Machines that Swoop, Spin, Stack, and Swivel with Hands-On Engineering Activities by Laura Perdew
Why use a simple hand motion to wipe your mouth when you can build a machine to do it for you? Toppling dominoes, rolling marbles, racing balloon cars, springing catapults and whizzing zip-lines are all elements used to build Rube Goldberg machines in Crazy Contraptions: Build Rube Goldberg Machines that Swoop, Spin, Stack, and Swivel with Hands-On Engineering Activities. The book introduces kids ages 9–12 (and beyond!) to the wacky machines designed by Goldberg, which were based on complicated chain reactions used to accomplish very simple, sometimes ridiculous, tasks.